

If you ever wished your streaming TV setup could feel more like using a TiVo DVR in its heyday, Channels DVR might be what you’re looking for.
This DVR service for cord cutters can record from both an antenna and live streaming channels. It also includes some crafty ways to bring in video from other sources, from ripped DVDs to streaming services such as Netflix, and it can even automatically skip through ads.
Channels DVR isn’t for everyone, as the setup requires pulling together a lot of disparate pieces on both the hardware and software sides. Those who are mostly satisfied using apps like Netflix, Hulu, and Sling TV on a streaming player or smart TV shouldn’t bother.
But for folks who crave more control over their TV experience and don’t mind a bit of tinkering, the payoff can be significant. Read on for more details on how to put it all together.
This is the first of a two-part series on Channels DVR, covering the basic setup requirements and process. In the second installment, I’ll discuss the advanced features you can use to make your DVR even more powerful.
What is Channels DVR, exactly?
Channels is a DVR service that you run on your own hardware, such as a desktop computer, NAS box, Raspberry Pi, or Nvidia Shield TV Pro. Channels’ server software handles the recording, then streams the video to its companion apps, available on Apple TV, Amazon Fire TV, Android TV, iOS, and Android mobile devices.
Channels is not a source of content in itself, however; to feed the DVR, you must supply your own sources of video. Here’s a list of sources Channels DVR currently supports:
- Over-the-air or cable channels from an HDHomeRun tuner.
- Streaming cable channels from any service that supports TV Everywhere authentication. These include YouTube TV, Hulu + Live TV, Xfinity, Verizon Fios, and many others. (Note that not all channels work with TV Everywhere, and not all sources work with Channels DVR. View the support list first.)
- Personal video collections, such as ripped DVDs or YouTube downloads.
- Recordings from PlayOn, a separate service that lets you record from services like Netflix.
- Online live streams from any source that offers M3U playlist files. (More on this later.)
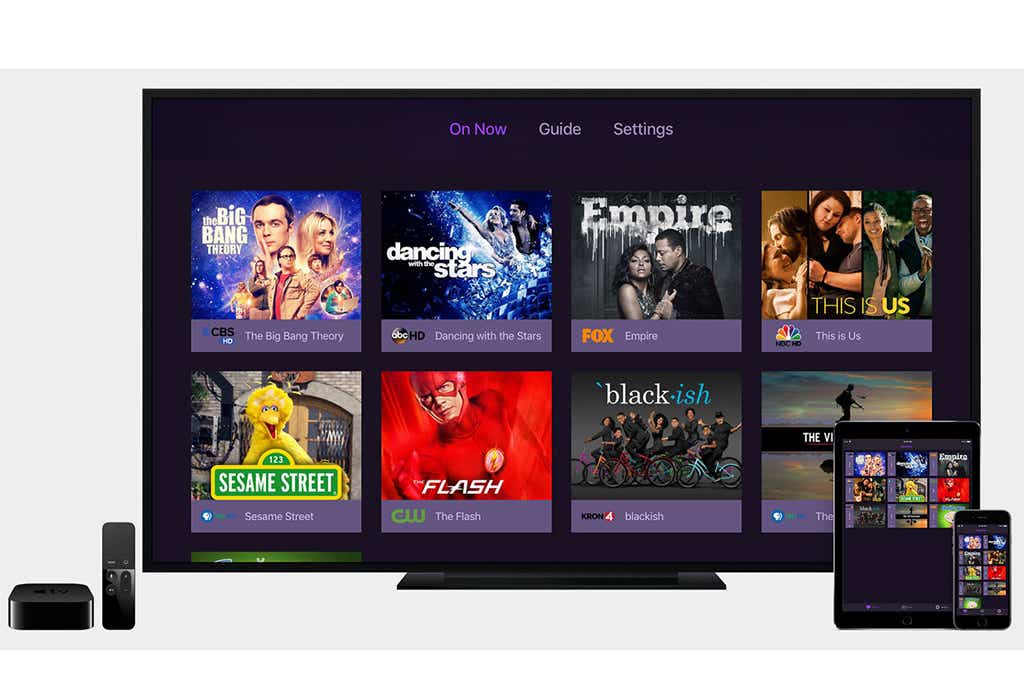
Channels pulls over-the-air and streaming sources into one place.
Jared Newman / Foundry
Channels DVR takes all of these disparate sources and brings them into one app, with a unified channel guide for live TV, granular recording controls, and a single library for all your movies and shows. For more details on those features, check out my Channels DVR review.
The Channels DVR service costs $8 per month or $80 per year, but again, that subscription doesn’t include content. If you want to bring cable channels into Channels, for instance, you’ll still need to pay for them separately.
Why use Channels DVR?
Despite the additional costs and the setup involved, Channels is worth considering because of the control that it offers.
For example, it offers automatic commercial skipping, so you don’t even need to touch the remote to jump through ads. You won’t get that by using YouTube TV or Hulu + Live TV in their own apps.

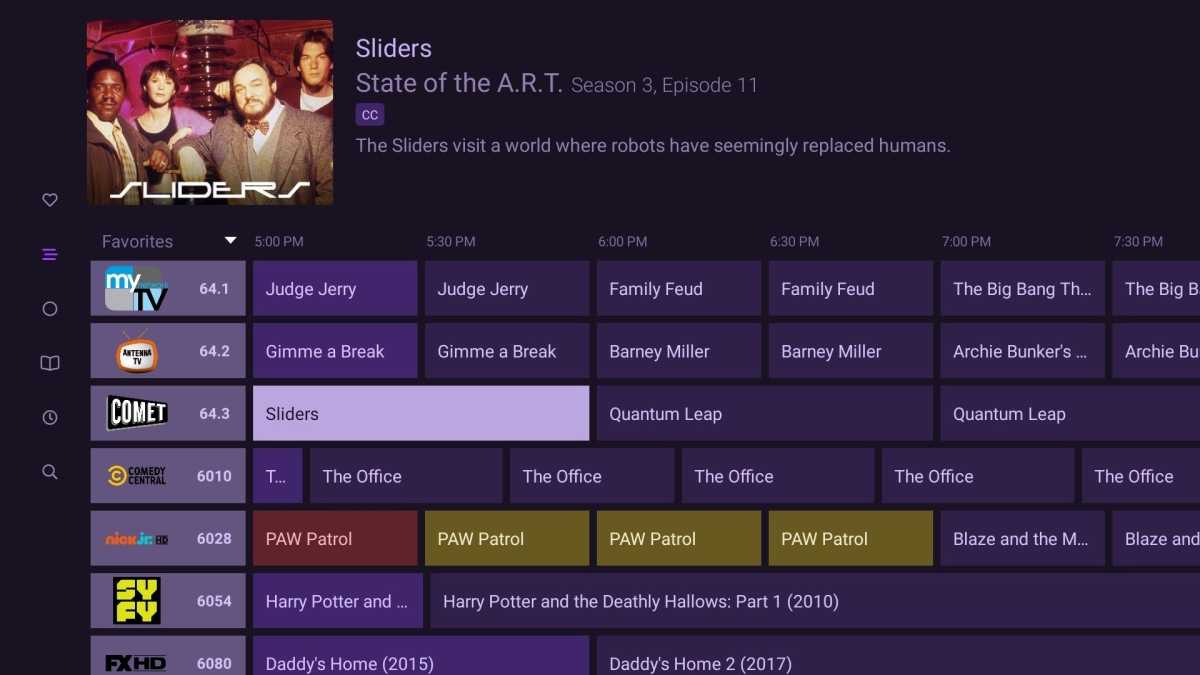
Channels DVR can detect commercials and skip them automatically.
Jared Newman / Foundry
Channels DVR also bypasses annoying restrictions that you often run into with streaming services. You can watch outside the home from anywhere—even out of the country—and the videos you download in Channels’ mobile apps will never expire.
The service is deeply customizable as well, letting you create your own channel collections, set up custom TV guide filters, and even create your own “virtual channels” out of the movies and shows in your library. Ever wanted a channel that only shows your favorite comedies? You can make it.
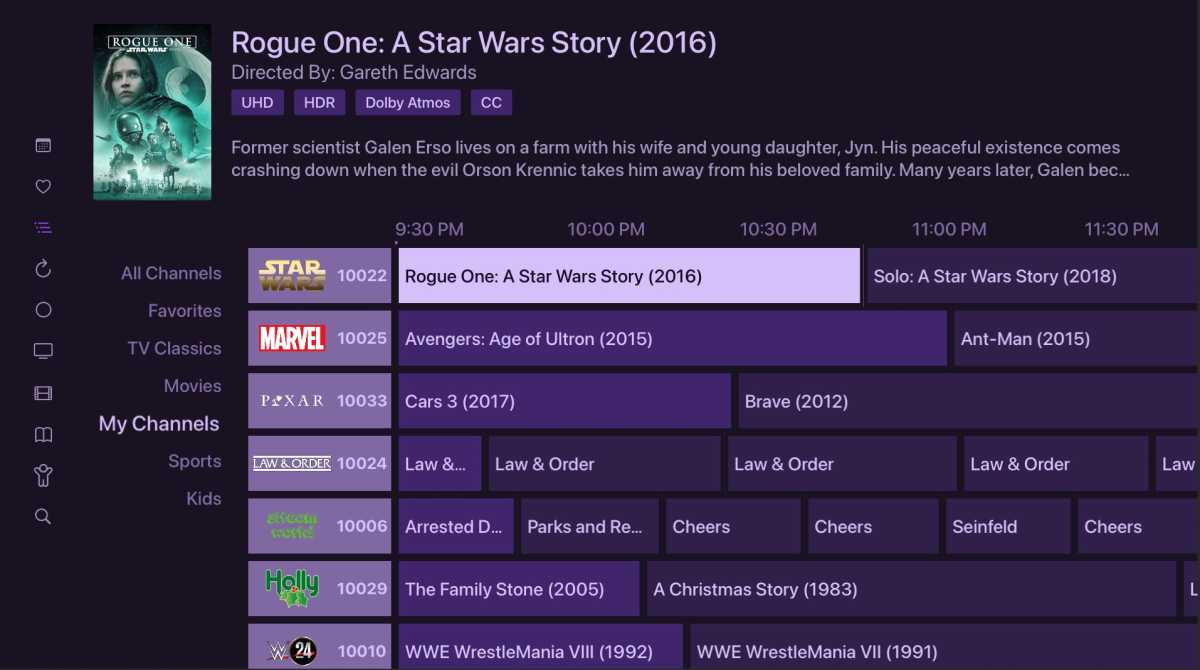
Create your own round-the-clock channels out of recordings in your library.
FancyBits
Best of all, Channels lets you keep your content. If you record some cable shows via a YouTube TV subscription, for instance, you can cancel that subscription and still access all your recordings. That means you can add, drop, or switch between TV services without losing your DVR library every time.
Choosing your Channels DVR server
The server acts as your DVR’s central brain, pulling in different sources of content, recording them to local storage, and streaming the video back out to your smart TV or streaming player. The more powerful your server is, the more it can handle in terms of streaming and recording, so you’ll need to choose this device wisely.
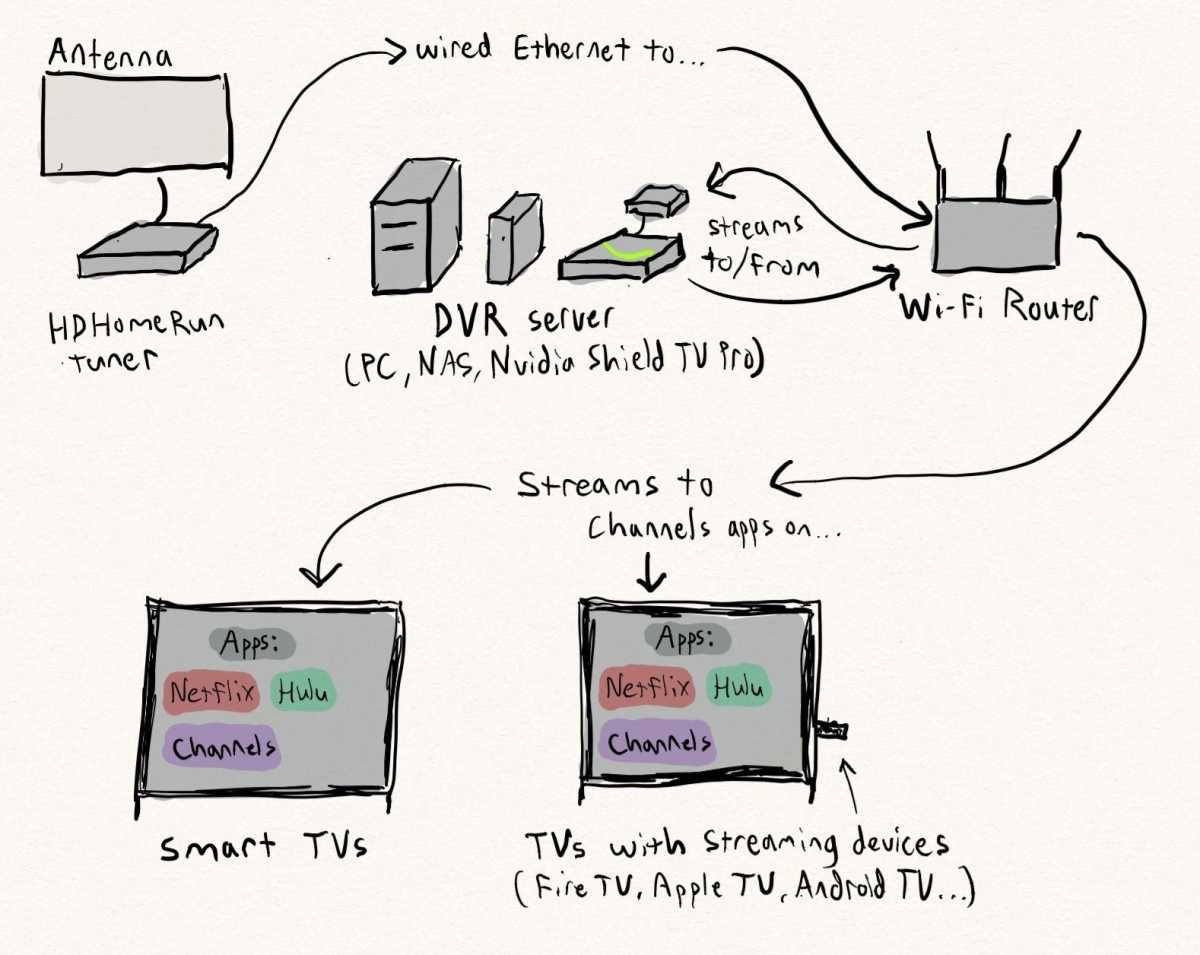
Jared Newman / Foundry
Here are your options:
- Desktop PC running Windows, Mac, or Linux: This is the best option for most users, as it gives you plenty of power and a mostly hassle-free setup. I personally run Channels DVR on an M1 Mac Mini, and it’s been rock solid. If you don’t already have a desktop computer to spare, consider finding a used or refurbished one for cheap on a site like Backmarket or eBay.
- NAS device: Channels supports a variety of devices with app support, including Synology, QNAP, and WD MyCloud. I admittedly don’t have experience with this option so I can’t speak to its reliability.
- Raspberry Pi: These mini-computers are extremely hard to find in 2022, but they can run Channels if you own one and have the technical chops to complete the installation. Just note that the lightweight processor can take longer to tag commercials, and it will struggle to transcode—that is, reduce bandwidth for streaming and recording—for more than one stream at a time.
- Nvidia Shield TV Pro: This is by far the simplest option to set up, but I’ve found performance to be flaky, with videos occasionally freezing or crashing.
In all cases, you’ll also need a hard drive big enough to store your recordings. I recommend a 500GB drive at minimum, but you’ll likely want a lot more storage than that. For desktop PCs, either an external or internal drive should be fine.
Note that if you want to use PlayOn Home to record videos from Netflix, Hulu, and other streaming services, you’ll need a Windows PC. This is a separate, $5-per-month service and is only available on Windows 10 and higher. As an alternative, PlayOn offers a cloud-based service that integrates with Channels, although this uses a “credits” system in which you must pay for each recording. (Part two of this series discusses these options in greater depth.)
Connecting an antenna or CableCARD
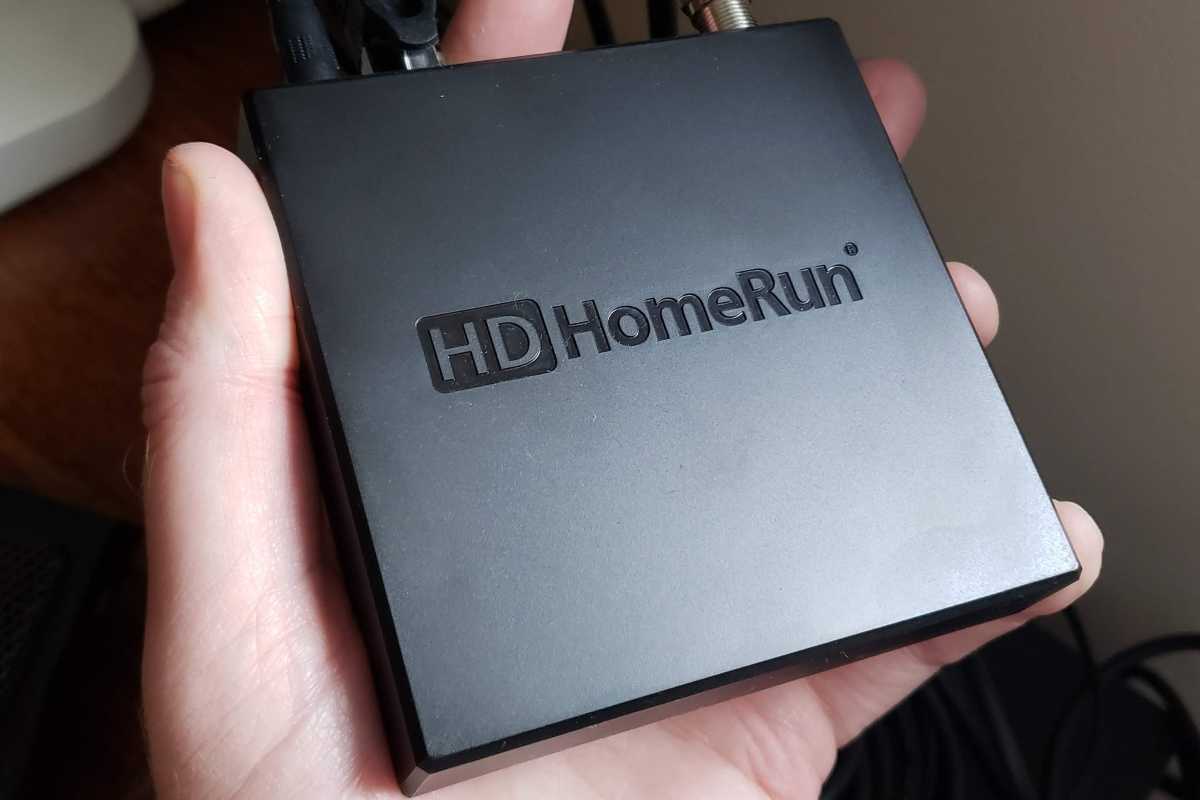
An HDHomeRun tuner will let you record channels from an antenna.
Martyn Williams / Foundry
The last thing to consider is a SiliconDust HDHomeRun tuner, which you’ll need to record over-the-air broadcasts from an antenna. Look for these three models in particular:
- HDHomeRun Flex Duo: Play or record up to two OTA channels at a time ($110)
- HDHomeRun Flex Quatro: Play or record up to four OTA channels at a time ($155)
- HDHomeRun Flex 4K: Play or record up to four OTA channels at a time, including two with ATSC 3.0 support ($199)
Channels does support multiple tuners, so you can add more HDHomeRun devices as you go and feed them all into a single DVR, but note that each will need its own antenna (the tuners above will all use just one antenna).
In all cases, the tuner pulls in local broadcasts from an antenna, then plugs into your home Wi-Fi router to deliver the video the server. That means you’ll need to set up the tuner and antenna near your router unless your home has wired ethernet running through it, or you’ve run coaxial cable to another part of the house.
For cable subscribers, Channels DVR also supports the HDHomeRun Prime, which costs $150 and can play or record up to three channels at a time using a CableCARD.
Putting it all together
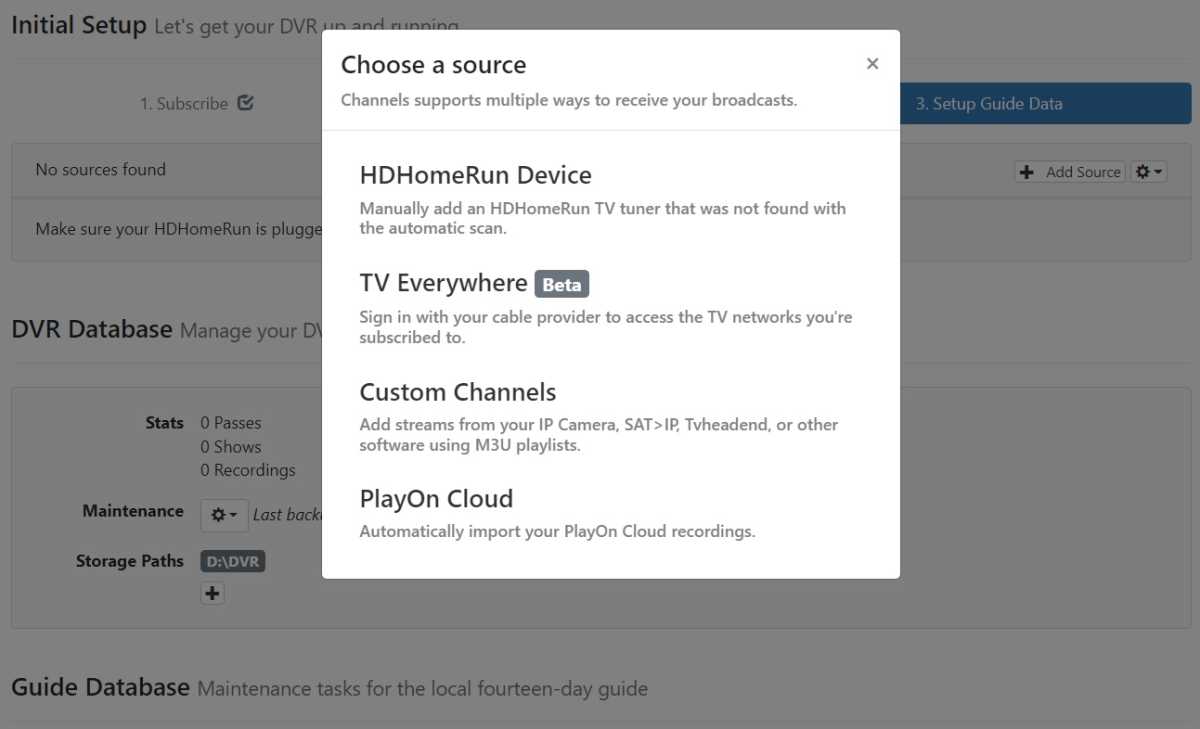
Just pick your sources in the Channels setup wizard, and you’re good to go.
Jared Newman / Foundry
Once you’ve picked out and assembled all the individual pieces, the actual setup itself is fairly straightforward:
- Install the Channels DVR software to your server device.
- For desktop computer installations, select “Open DVR Settings” or visit http://localhost:8089 in your web browser.
- For a NAS box or Raspberry Pi, you’ll need to replace “localhost” with your device’s IP address. (Here’s a useful guide for looking that up.)
- In the setup wizard, choose the directory where you want to store recordings. (If you’re using an external hard drive, make sure to set your storage location there.)
- Channels will detect any HDHomeRun tuners automatically and begin a channel scan.
- For other sources, such as TV Everywhere channels or PlayOn Cloud recordings, select “Add Source Manually,” then choose your source from the list.
- Download the “Channels: Whole Home DVR” app for Apple TV, Fire TV, Android TV, iOS, or Android mobile. If your streaming device is on the same Wi-Fi network, it should find your DVR automatically.
Now that you’ve set everything up, it’s time for the fun part. Use the Guide or Search menus to find upcoming programs and add them to your DVR list.
One last thing: In the Channels app on your TV, head to Settings > Playback > Commercial Skipping, and make sure Commercial Skipping is set to “Automatically.” After going through this setup process, you deserve to sit back and relax.
Stay tuned!
The real fun with Channels DVR comes from customizing your setup and finding new sources to record. I cover all of that in part two of this Channels DVR how-to series.
In the meantime, subscribe to my Cord Cutter Weekly newsletter for more advice on ditching cable, or send me an email with any questions you might have.
Author: Jared Newman, Contributor

Jared has been a freelance technology journalist for more than 15 years and is a regular contributor to PCWorld, Fast Company, and TechHive, where he's written a weekly cord-cutting column since 2014. His Cord Cutter Weekly newsletter has more than 30,000 subscribers, and his Advisorator tech advice newsletter is read by nearly 10,000 people each week. Jared has a master's degree in journalism from NYU and specializes in making complex tech topics easy to understand, from streaming and cord-cutting to neat apps and useful tech tricks. He is based in Cincinnati, OH.