

Channels DVR is a powerful way to record live TV from an antenna and cable channels, but if that’s all you’re using it for, you’re not really making the most of it.
In the first part of this series, I wrote about how (and why) to set up Channels DVR. This article assumes you’ve already done that and covers some advanced tricks to make your DVR even more useful. You’ll learn how to record from more video sources, customize your channel list, and even roll your own round-the-clock streaming channels.
Take advantage of these tips, and you’ll wind up with a single app that can cover the vast majority of your TV viewing.
Configure your DVR from anywhere
Jared Newman / Foundry
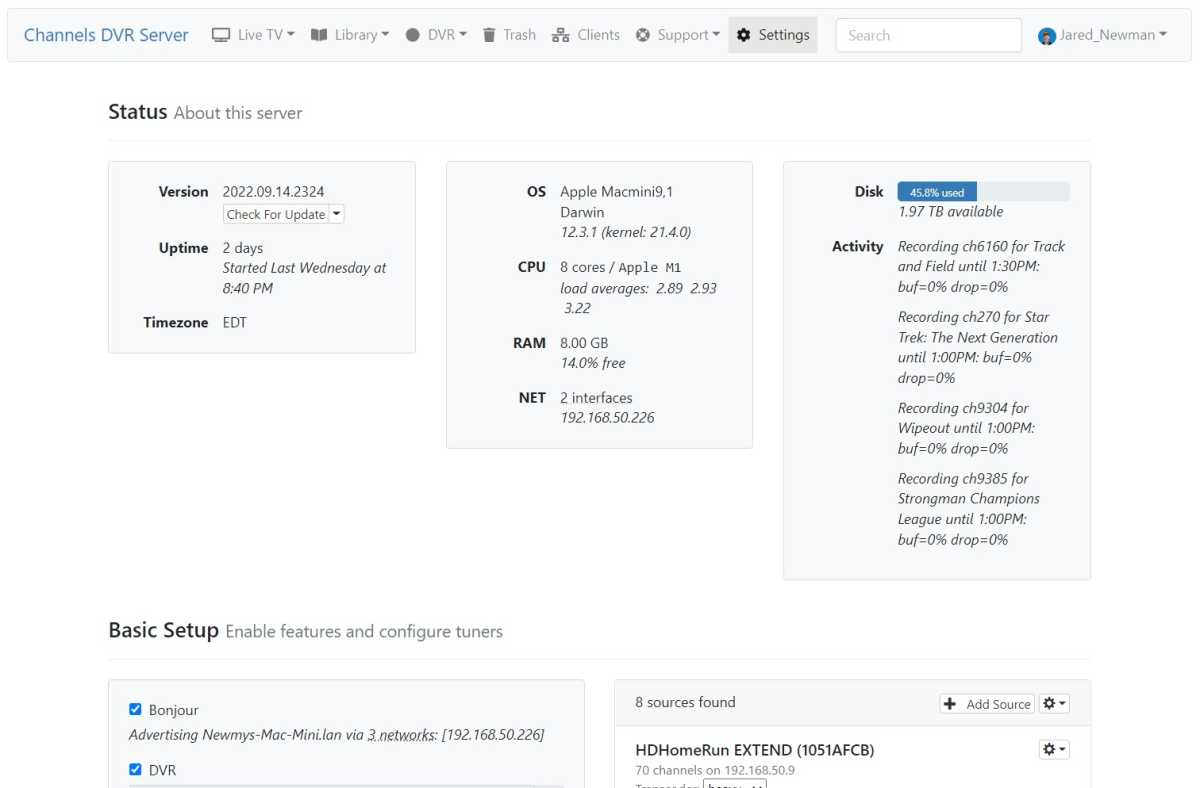
We’ll make extensive use of Channels’ web-based dashboard in this guide, so make sure you know all the ways you can access it:
- Log into your Channels DVR Account page and head to the “Your DVR” section to find links to your dashboard.
- If you’ve set up remote streaming, just enter my.channelsdvr.net in any web browser
- For desktop installations, click the Channels icon in your menu bar, then select “Configure.”
Customize your channel list
Jared Newman / Foundry
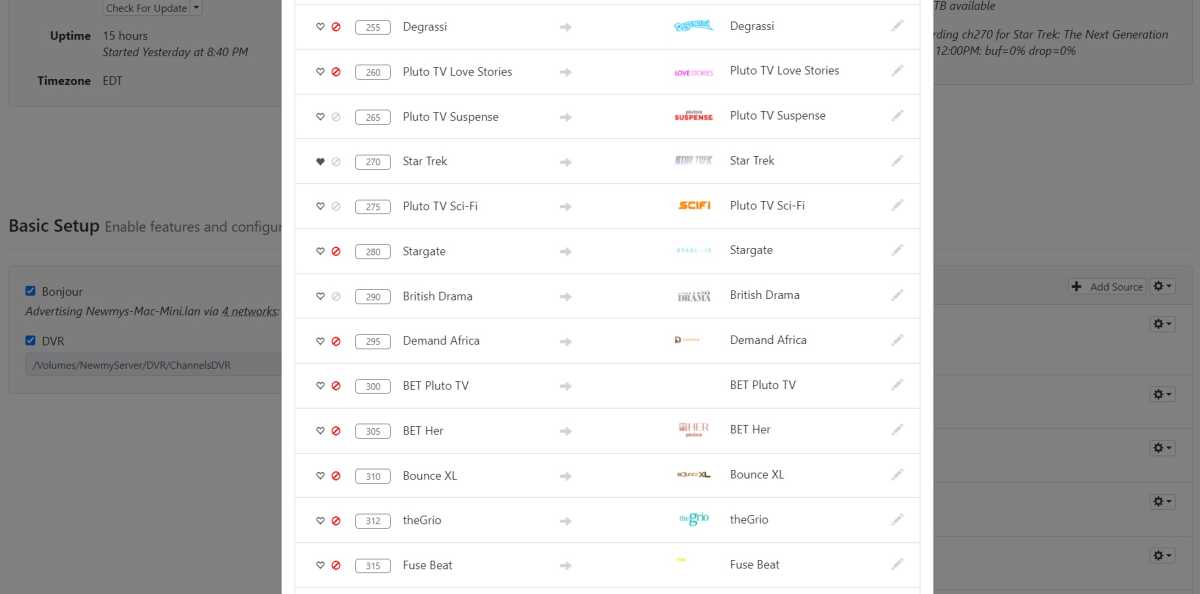
Using Channels’ web-based dashboard is the most efficient way to hide channels from your guide or add them to your favorites list. Just click the gear icon next to any source, select “Manage lineup,” then use the ♥ favorite or 🚫 remove icons for each channel.
Add your video library
Jared Newman / Foundry
Got a collection of DVDs you’ve ripped onto your computer? How about videos from YouTube that you’ve downloaded with software like YT-DLG or ViDL? By adding them to your Channels DVR catalog, you can stream them from any device around the house.
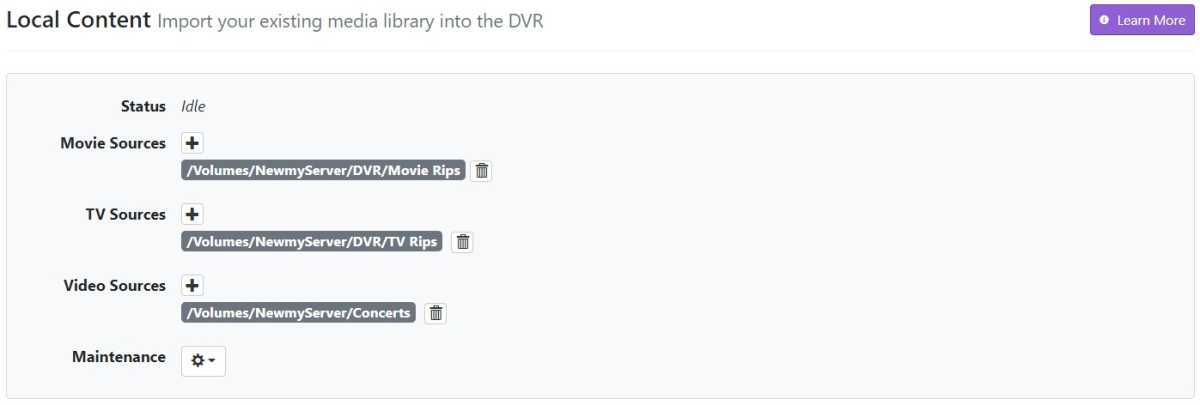
In the web dashboard, scroll down to “Local Content.” Hit the + button next to “Movie Sources” or “TV Sources,” then select the folder where your videos are stored. For most movies and shows, Channels will automatically apply cover art and descriptions, and it will add the content to the “Library” section of the app.
You can also hit + next to “Video Sources” to add other types of videos, such as your home movie collection.
Record from Netflix, Hulu, and more
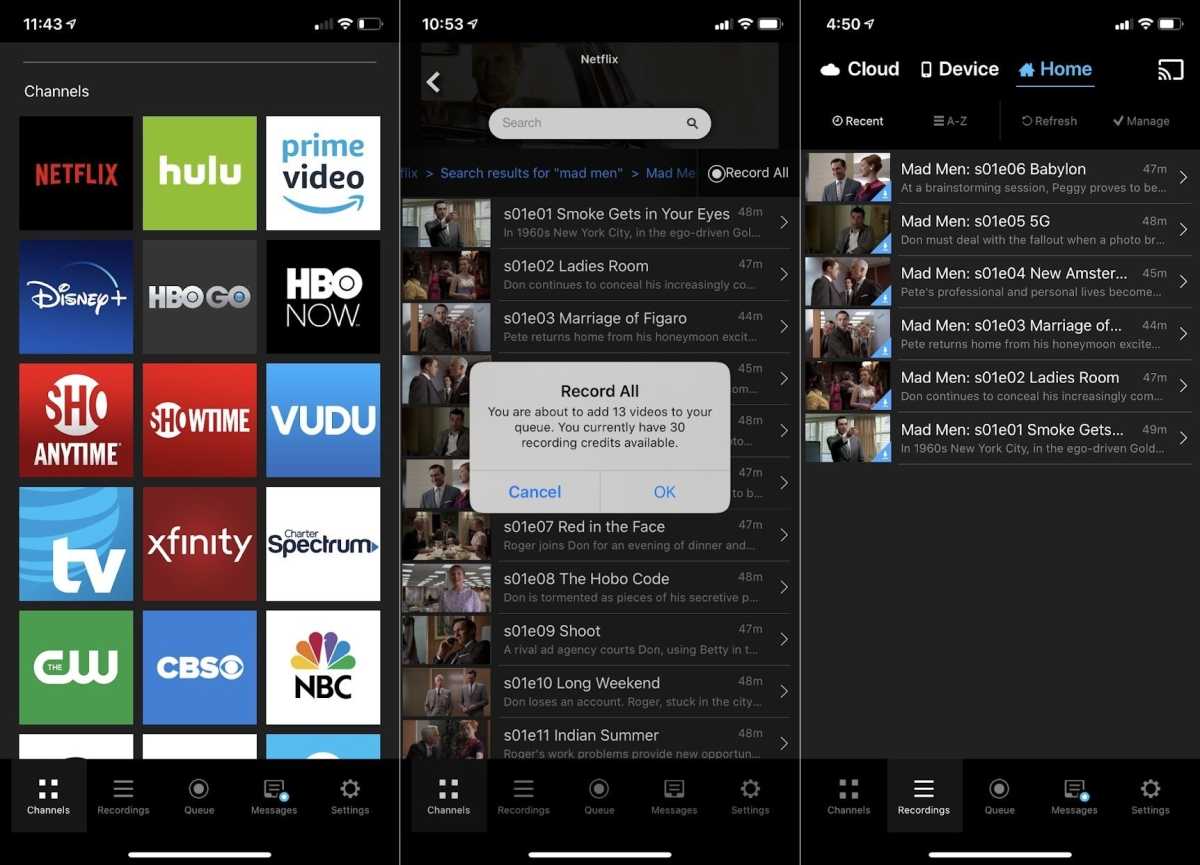
With the PlayOn Cloud mobile app, you can record from streaming sources, then automatically pull the videos into your Channels library.
Jared Newman / Foundry
By tying into a separate service called PlayOn Cloud, Channels can serve as a DVR for streaming services such as Netflix, Hulu, and Disney+. PlayOn Cloud is a paid service, and you can purchase recording credits for about about $0.15 per movie or TV episode in 720p. (Recording in 1080p uses three credits instead.)
Despite the added expense, there are several reasons to consider combining PlayOn with Channels:
- You can skip commercials, even in ad-supported services.
- You get to keep your recordings even if a show gets pulled from a streaming service, or if you stop subscribing to that service.
- In Channels’ mobile apps, you can download movies and shows with no time limits.
- You can centralize more of your streaming content into one app.
After buying some credits, download PlayOn’s iOS or Android apps, sign into your streaming accounts, and choose which programs you’d like to record.
Then, head the Channels dashboard and select “Add Source.” Choose “PlayOn Cloud,” then connect your account. Channels will automatically add PlayOn recordings to your DVR library once they’re complete.
If you’d rather avoid PlayOn Cloud’s pay-as-you-go pricing, you can subscribe to PlayOn Home for $5 per month (or $40 per year) and record unlimited programs through a Windows PC. You can then add PlayOn recording folders to your library through the Local Content section of the dashboard.
Add web video streams
Jared Newman / Foundry
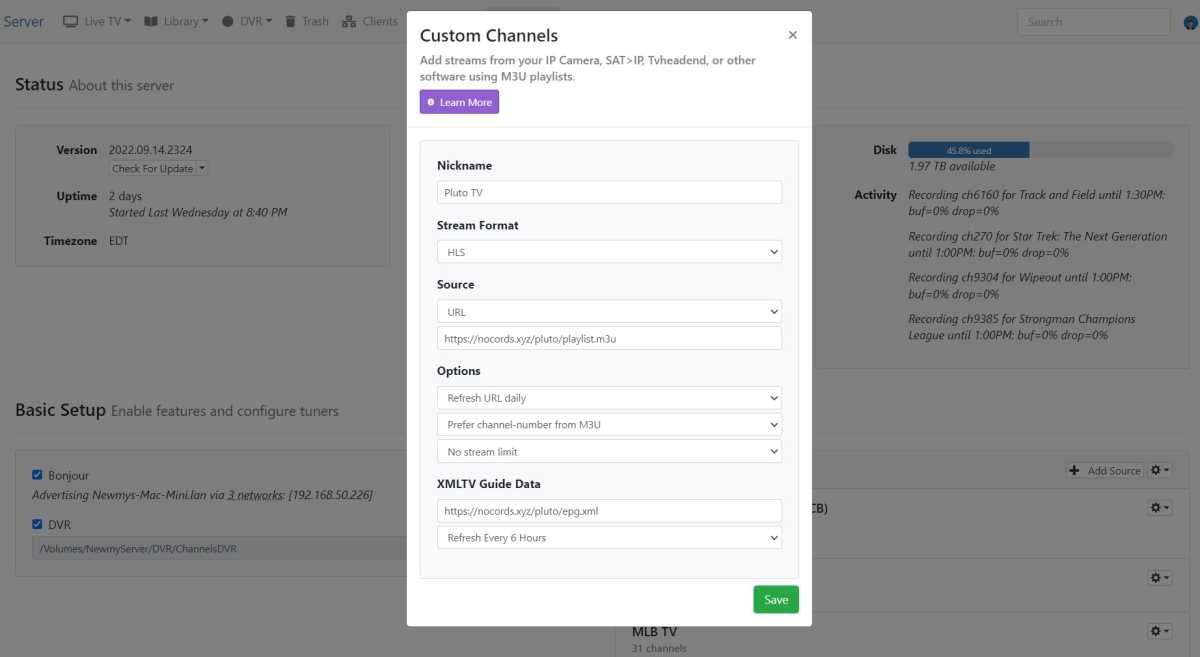
One of Channels’ most interesting features is its ability to play and record any online video source that offers an M3U playlist. Industrious Channels users have in turn figured out how to pipe in video from free streaming apps such as Pluto, Stirr, and Samsung TV Plus.
Using Pluto TV as an example, here’s how to set this up:
- Head to the Channels web dashboard, click “Add Source,” and select “Custom Channels.”
- Under “Nickname,” enter “Pluto TV.”
- Under “Source,” paste the following in the URL field: https://nocords.xyz/pluto/playlist.m3u
- Under “Options,” change “Never refresh URL” to “Refresh URL Daily.”
- Under “XMLTV Guide TV,” paste the following: https://nocords.xyz/pluto/epg.xml
- Change “Refresh Daily” in this section to “Refresh Every 6 Hours.”
- Hit “Save.”
You should now have an extra 300-plus channels in your grid guide, complete with recording capabilities. Use the same process to add custom channels for Stirr and several other sources.
With a bit more technical know-how, you can also use Docker to bring in certain subscription video services that require a login to access. Install Docker Desktop for Windows, Mac, or Linux—ideally on the same computer where your Channels server is running—then try following the setup instructions for MLB TV, ESPN+, or Frndly TV.
Create your own channel lists

Jared Newman / Foundry
While Channels offers a handful of ways to filter the live TV guide out of the box, you can also set up your own filters instead. You might, for instance, have a filter for “Comedy,” or one for “Cooking.” Or, you can set up separate lists of favorite channels for each family member.
- In the web dashboard, click the Live TV tab and select “Channel Collections.”
- Click Add Collection in the left sidebar, then hit the pen and paper icon to give it a name.
- Use the top menu section to manually add individual channels to the list.
- Use the “Automatic Channels” section to add channels by genre or content type.
Unfortunately, creating these custom filters doesn’t automatically add them to your guide. For that, you’ll need to follow some extra steps:
- Click the Clients tab at the top of the dashboard.
- Scroll to the bottom of the page, then select “Server Side Only.”
- Check off “Channel Collections,” then select “Add Settings.”
- In the right-hand menu, click “Select,” then choose the Collections you want to appear.
Note that this will override most of Channels’ default filters, such as Movies and Sports, but you can recreate these lists yourself using the “Automatic Channels” feature.
Roll your own channels
Jared Newman / Foundry
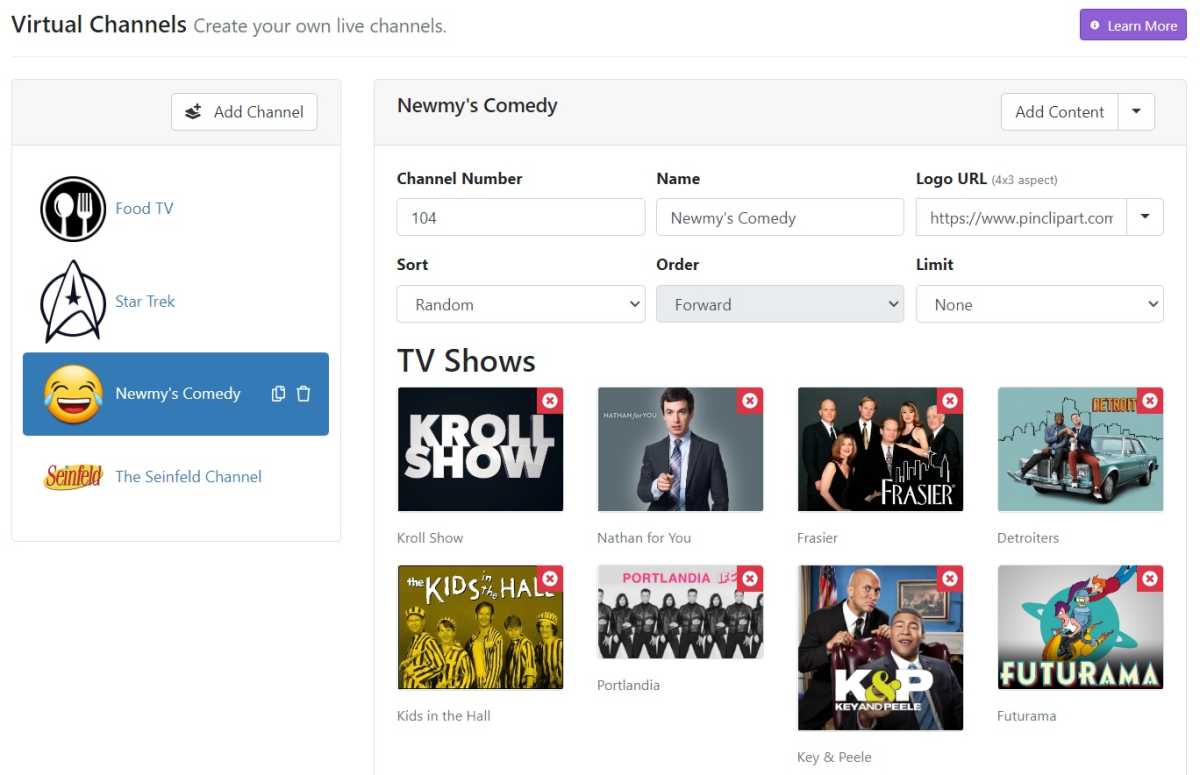
Once you’ve started to amass some recordings, you can throw them together into round-the-clock custom channels, mimicking the leanback experience of cable but with shows you want to watch.
- In the web dashboard, click “Live TV” and select “Virtual Channels.”
- Click “Add Channel” in the left sidebar.
- In the right panel, click “Add Content” at the top and choose the movies or shows you want to include. (You can also click the down arrow and select “Create Smart Rule” to automatically pull in content based on genre, director, or other criteria.)
- Give your channel a name, upload a logo image, and decide how to sort the episodes.
You can read more about playback and filtering options on the Virtual Channels documentation page.
Speed up commercial detection
In the dashboard, scroll down to “Commercial Detection,” then check the box that says “Start live detection when watching in-progress recording.” That way, you can start skipping through ads even before a program is finished airing.
In this same section, you can also try increasing the number under “Thread Count” to speed up commercial detection, but note that using too many threads can crash your computer if it’s not powerful enough.
Fix commercial detection issues
Jared Newman / Foundry
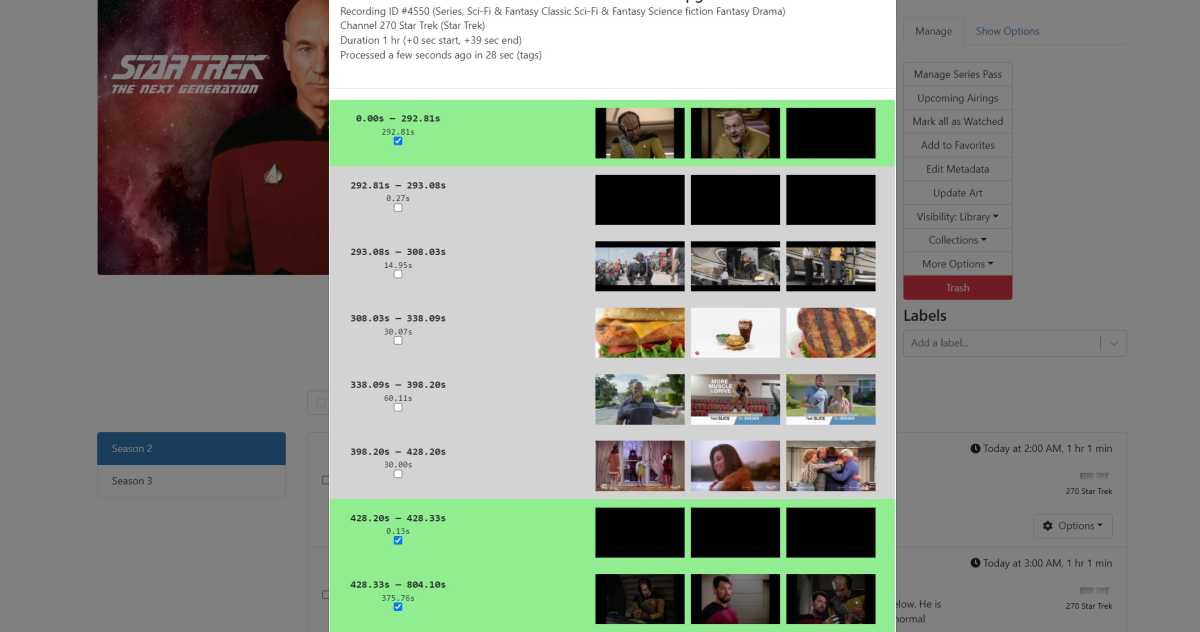
Channels’ commercial skip feature is usually pretty accurate, but if you spot a problem, you can fix it manually. In the web dashboard, click Library, then TV Shows. Navigate to the show and episode you want to fix, then click “Options” and select “Edit Commercials.”
This brings up series of thumbnails, with the show sections highlighted in green and the commercial sections in gray. Check or uncheck each section accordingly to adjust the boundaries of each commercial break.
Get a more traditional remote
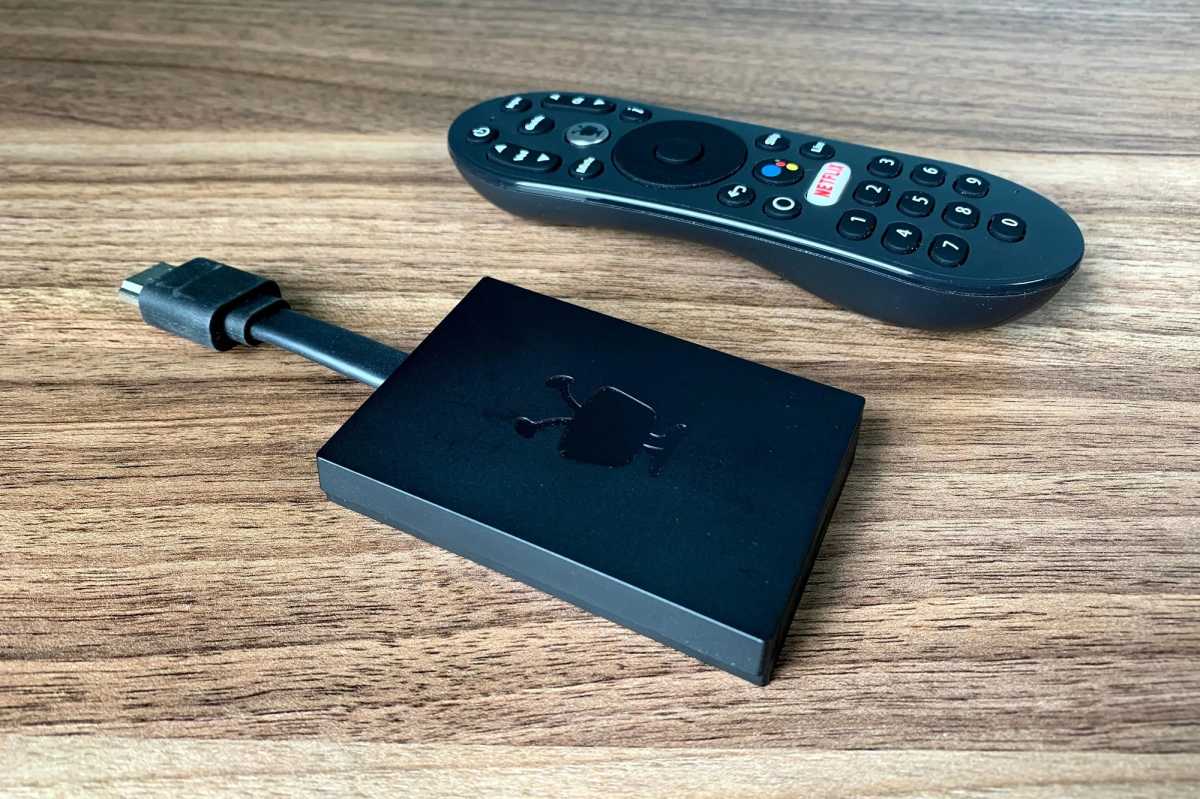
The TiVo Stream 4K remote buttons can be remapped as shortcuts in Channels DVR.
Jared Newman / Foundry
If you’re missing the creature comforts of a cable remote, such as the guide button, number keys, and channel up/down buttons, you can get them in Channels via the TiVo Stream 4K. This $40 streaming dongle’s remote has all those cable-like features, and you can easily remap them to work with Channels DVR.
First, you’ll need to sideload the beta version of Channels DVR onto the TiVo Stream:
- In the regular Channels app, head to Settings > Support > Install Beta app
- Select “OK,” then enable Channels DVR under “Install unknown apps.”
- Return to the previous menu and select “Install Beta app” again.
- Select “Install” when prompted.
Now, open the Channels DVR beta app and head to Settings > General > Remote Shortcuts > Channels Button Detector > Open Settings. From the Accessibility menu, enable “Channels Button Detector.”
Now, you can use the TiVo button to open Channels DVR, jump to the grid guide with the Guide button, flip through channels, and even punch in specific channel numbers.
Poke around
Channels DVR has an impressive number of other settings and tweaks that I haven’t covered here. If you want to tinker some more, I suggest poking around the web dashboard or looking around the Settings menu in Channels’ streaming apps to see what’s possible.
If you have any questions about this guide, send me an email, or sign up for my Cord Cutter Weekly newsletter to get the latest advice every Friday.
Author: Jared Newman, Contributor

Jared has been a freelance technology journalist for more than 15 years and is a regular contributor to PCWorld, Fast Company, and TechHive, where he's written a weekly cord-cutting column since 2014. His Cord Cutter Weekly newsletter has more than 30,000 subscribers, and his Advisorator tech advice newsletter is read by nearly 10,000 people each week. Jared has a master's degree in journalism from NYU and specializes in making complex tech topics easy to understand, from streaming and cord-cutting to neat apps and useful tech tricks. He is based in Cincinnati, OH.